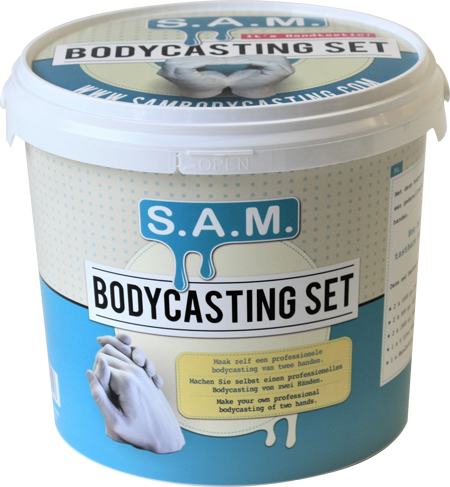
S.A.M. Bodycasting set
A TANGIBLE, LASTING MEMORY
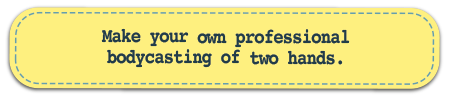
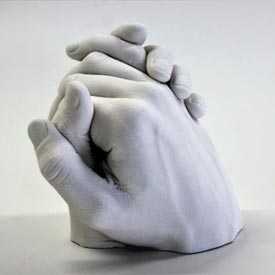
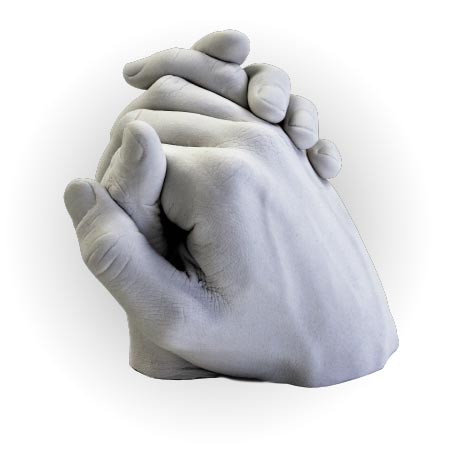
A memory is a beautiful thing, it is an experience or a moment stored in your brain. A way to go back in time and relive something precious. With SAM’s Bodycasting Set, this memory not only remains but is also made tangible.
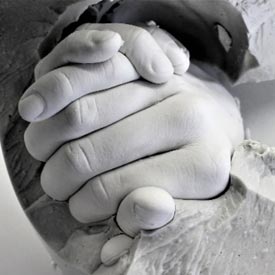
Those little innocent baby hands, the somewhat rebellious adolescent hand, two hands in love just after saying ‘I do’ or hands with a life full of experience. In a beautiful way, every detail of your loved ones is recorded in a three-dimensional copy.
HOW DOES IT WORK?
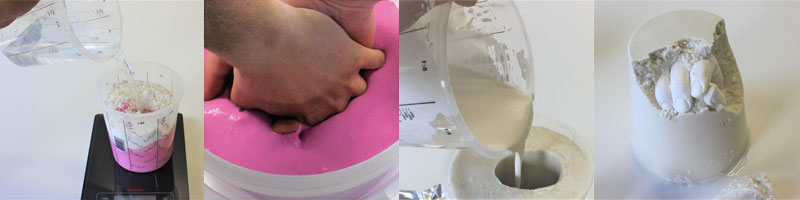
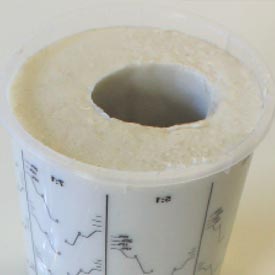
Using 3D-Gel and water, you can make a mould of the hand or several hands. After about 3 minutes of waiting, the 3D-Gel is sufficiently hardened and the mould can be filled with 3D- plaster. To do this, mix the 3D-Plaster powder with cold water and carefully fill the mould. After another 30 minutes of waiting, the 3D-Plaster has hardened and the 3D-Gel can be removed. Exciting! Finally, use a tooth pick to check the statue and remove any remaining 3D-Gel and small irregularities in the plaster. And there you go, an amazing and very detailed hand image.
WHAT CAN I SHAPE?
With 3D-Gel and 3D-Plaster you can shape not only hands but also other body parts such as feet, arms or a face. Many people have already copied a dog’s leg or even a horse’s foot with this set.
The set
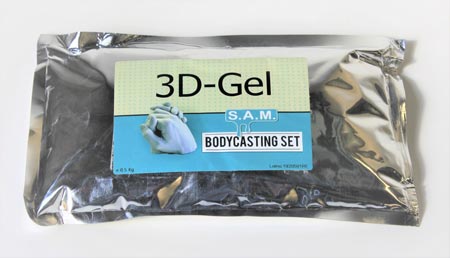
SAM Bodycasting Set is used to copy hands, feet or other body parts with a plaster figure as the end result. The set contains not only 3D-Gel, 3D-Plaster and mixing cups, but also a clear manual to ensure the best result. This set has been carefully composed by us and contains only the best products. We have chosen materials that are both easy and safe to use.
WHAT IS 3D-GEL?
3D-Gel is a hydrophilic polymer made of seaweed. The main component is alginic acid. Simply put, 3D-Gel consists of dried seaweed that is ground into a powder.
Finally, a scent and colour indicator are added, making it easier and more pleasant to use.
Because 3D-Gel is completely organic and not harmful to humans and the environment.
MESSAGES FROM USERS

Manual
Each set comes with an easy-to-use manual. This manual is written in 3 languages (NL, DE, EN) and contains lots of pictures so you can easily see how it works. Below you will also find a step-by-step plan of how to proceed, step by step. You can also download a PDF Version of the manual.
Success guaranteed!
 |
STEP 1.Calculate the correct amount of 3D-Gel with the ratio of [water:3D-Gel] = [4:1]. Example: with 2000 grams of water you need 500 grams of 3D-Gel. |
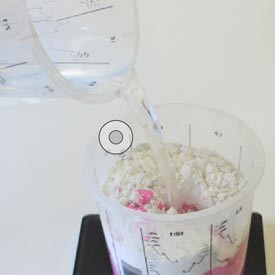 |
STEP 2.Fill the bucket with water and then add the 3D-Gel all at once. The substance becomes bright pink. |
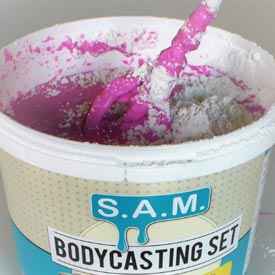 |
STEP 3.Use an electric mixer to mix the 3D-Gel and the water, until an even mixture is formed. Do not mix too long because the 3D-Gel starts to harden after 1 minute |
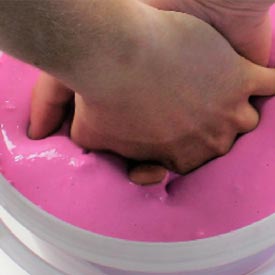 |
STEP 4.Place the body part in the mixture and move it slightly so that any air bubbles can escape. |
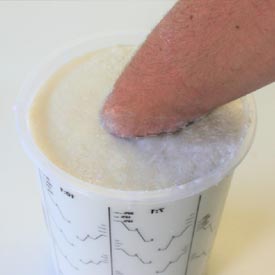 |
STAP 5.Do not move the body part until the 3D-Gel has hardened. This can be seen in the colour of the 3D-Gel: as soon as it is white you can carefully take the body part out of the shape (see step 6). Don’t use a difficult position and make sure that the air can escape. Otherwise, you may get voids in the mould. (see illustration) |
 |
STAP 6. ONTMALLENAls de 3D-Gel is uitgehard beweeg je het lichaamsdeel voorzichtig zodat het vacuüm wordt opgeheven. Neem hier de tijd voor! Hoewel de gel sterk en elastisch is moet je opletten dat de mal niet inscheurt. |
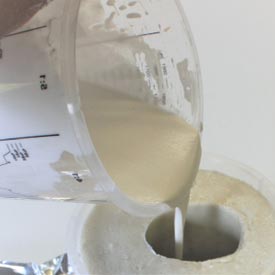 |
STEP 7. CASTINGWhen the body part has been removed, pour the casting material into the mould. This can be 3D-Plaster, acrylic resin, silicone gel, or any other casting material. ATTENTIONTip: start with filling half the mould and carefully rotate it so that the casting material reaches all cavities. Put the mould down and fill it completely. |
 |
STEP 8.Once the casting material has hardened, you can remove the 3D-Gel. The gel can then be put in the organic waste bin. |
 |
STEP 9.The end result can be easily reworked. The leftovers of 3D-Gel can be removed with a coctail pick. Any lumps can be removed with a sharp knife. |
FAQ
Despite the fact that this set is composed of easy-to-use products, it is possible that an error may occur. For this reason we have described the most common errors below:
3D-Gel
- My 3D-Gel mixture contains many lumps, always use a mechanical mixer to mix 3D-Gel. A kitchen mixer is good, but a drill with a mixing rod is better. Always use the mixer or drill at the highest possible setting.
- My 3D-Gel mixture contains a lot of air bubbles, by mixing at a higher speed a lot of air bubbles will appear in the 3D-Gel mixture. So hit the side of the bucket or cup to force out any air bubbles. Quick left/right rotation of the bucket will also help.
- My 3D-Gel mixture hardens too quickly, the use of lukewarm or even warm water drastically affects the processing time. Use cold water to extend the working time.
- My 3D-Gel mould contains a lot of water, 3D-Gel is an organic product with the ability to separate the absorbed water over time. For this reason, it is recommended that the time between making the mould and pouring in the 3D-plaster should be as short as possible. If there is water on the bottom of the mould, pour it out before pouring the 3D-Plaster into it.
3D-Plaster
- My plaster model breaks during demoulding, 3D-Plaster will harden within 30 minutes. The 3D-Plaster heats up and cools down within that time frame. In case of early demoulding, the 3D-Plaster may not be strong enough. Since the 3D-Plaster is only at full strength after 24 hours, you can choose to remove the mould only after 24 hours.
- The fingertips are not complete, probably air was trapped during the filling of the mould. We therefore advise you to tilt or even rotate the mould while filling the mould so that the air can escape from the fingers.
- My 3D-Plaster does not harden, most likely too much water was added to the mixture. The mixing ratio for the 3D-Plaster wand the water is 4 parts 3D-Plaster and 1 part water. So you add 250 grams of water to 1 kg of 3D-Plaster.
Safety, what if
3D-Gel is not harmful to people or the environment. In case of contact with the eyes, you can rinse with water. In rare cases allergy may occur, consult a doctor if you notice any symptoms.
3D-Plaster is not harmful to humans or the environment. In case of contact with eyes, rinse immediately with plenty of water. If taken orally, rinse mouth with water and then drink plenty of water. In rare cases allergy may occur, consult a doctor if symptoms persist.
Reseller
Would you like to sell the SAM Bodycasting Set in your (web)shop? Please contact us! SAM is always looking for partners who are as enthusiastic as we are.
Our terms and conditions:
- You need a Chamber of Commerce registration
- You need to keep stock
- Your website and/or company must be representative.
What can we offer you?
A super cool product that you can’t buy on every street corner. We offer a unique product for customers all over the world. As a reseller of the “SAM Bodycasting Set” you will have “something else” in your (web)shop.
You take care of the sales, we take care of the rest (if necessary). Think of customer support. Now this is rare, but if necessary our support department is ready for your customers (Dutch, German, English).
As a reseller you have a beautiful product on which we offer good support.
Please contact us using the form below and mention the subject “reseller”.
We will contact you within 1 to 2 working days.
Contact form
A TANGIBLE,
LASTING MEMORY